What you don’t see can hurt your mill

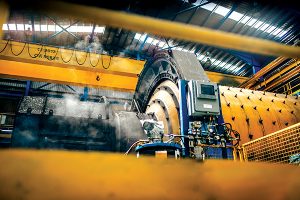
A Metso ball mill at work. CREDIT METSO CORP.
Do not let hidden defects bring your mill to a halt. Often, your mill can seem to be running smoothly until a major failure strikes. Over time, issues arise from wear and tear on your grinding mill that are not easily visible. Here are the top three undetected issues with grinding mills and how to catch them.
Misalignment, damaged gears and pinions, wash, leaks, structural failures and more can eventually bring your operations to a stop, often unexpectedly. When you are caught off guard, the damage can be exponentially worse and have a cascading effect on your operations. In this article, we discuss three common issues and tests that can help you spot these problems early and change the fate of your operations.
Cracks in gears and pinions
- PROBLEM: Small cracks can appear in the gears and pinions. If not detected early enough, cracks can progressively become worse until tooth breakage occurs.
- SUGGESTED TEST: Magnetic Particle Inspection, also known as MPI, is a non-destructive test for discovering surface and shallow discontinuities in ferromagnetic materials. If an indication is found such as a crack on a gear, the crack can be ground out or the tooth issue can be relieved by grinding out the crack.
The gear may be fit to run with or without repair, require flipping or replacement. Finding and fixing issues early will avoid undesired wear, broken teeth or even complete failure of the gear and pinion. An MPI test is done on a fully cleaned gear and pinion. This makes it easier for a trained expert to also perform a more thorough visual inspection to discover other issues caused by wear, contamination, or lack of lubrification. Other forms of inspection that do not require cleaning make it more difficult to spot these types of problems.
Slurry wash under the liner
- PROBLEM: In wet grinding mill applications, slurry can seep underneath trunnion or shell liners and start washing the mill components, particularly when the liner rubber backing is missing or damaged. Often, this goes undetected for long periods of time causing excessive wear to the mill rotating components.
- SUGGESTED TEST: To prevent a potential failure due to excessive wear, it is important to catch slurry build up behind liners. A quick and easy way to do this is with Ultrasonic Testing (UT). UT is a method used to measure the thickness of a mill structural component such as a head, trunnion, or the shell.
Operators can determine the location and extent of the thinning areas. Using a UT test has the benefit of detecting wash inside the mill without removing the liners, which minimizes downtime required for the inspection as it is performed from outside the mill.
Structural failure in mill components
- PROBLEM: A grinding mill goes through considerable rotations in one year and fatigue cracks can develop over time. If undetected, these cracks will grow until the components fail (crack through). Evaluating the causes of these cracks are as important as detecting them.
- SUGGESTED TEST: Magnetic Particle Testing is typically used to find cracks whereas Ultrasonic Testing is used to find and locate wear or wash in rotating components. Once the inspections are completed, a structural evaluation may be necessary.
This can be done using Finite Element Analysis. FEA is an engineering tool used to calculate stresses and deflections within a structure where a complex geometry is broken into smaller simple elements and results are then combined to give a complete picture. In most cases, and especially on newer mills, the causes of the structural failures are not due to a weak design, but rather mill abuse, mill overload, or wash. An FEA evaluation determines if a worn component is too thin and should be repaired before further damage occurs. Similarly, mill loading may be excessive and needs to be cut back. FEA can also help to determine what options could work as a temporary fix while waiting for a replacement part.
Looking beyond the obvious
Though important, visual inspections often do not give a full picture of your mill’s condition. Of course, it is important to visually inspect your mill but it is also important to use additional non-destructive methods to find defects that can easily be missed. Having a clear understanding of the complete health of your mill will better help with maintenance planning and avoid unwanted downtime and costs. To learn about all the different mill inspection packages and testing options from Metso, go the website at www.metso.com.
This article was originally posted on Metso’s website.
Comments